

How it works
From your shop floor to online orders — without complicated setup
Kliovio helps a small store take orders from a customer’s phone: through a link in social networks or a QR code on a counter, bag, or business card.
You do not need a website built from scratch, and you do not need a programmer. After your application is approved, you open the dashboard, add products, turn on the payment and fulfillment options you already use, and share a link or QR code.
- For florists, clothing, gifts, beauty, grocery, cafés, and other local shops.
- You manage products, prices, and orders yourself from a phone or a computer.
- You arrange delivery yourself — Kliovio is not a courier service.
Step 1
Submit an application
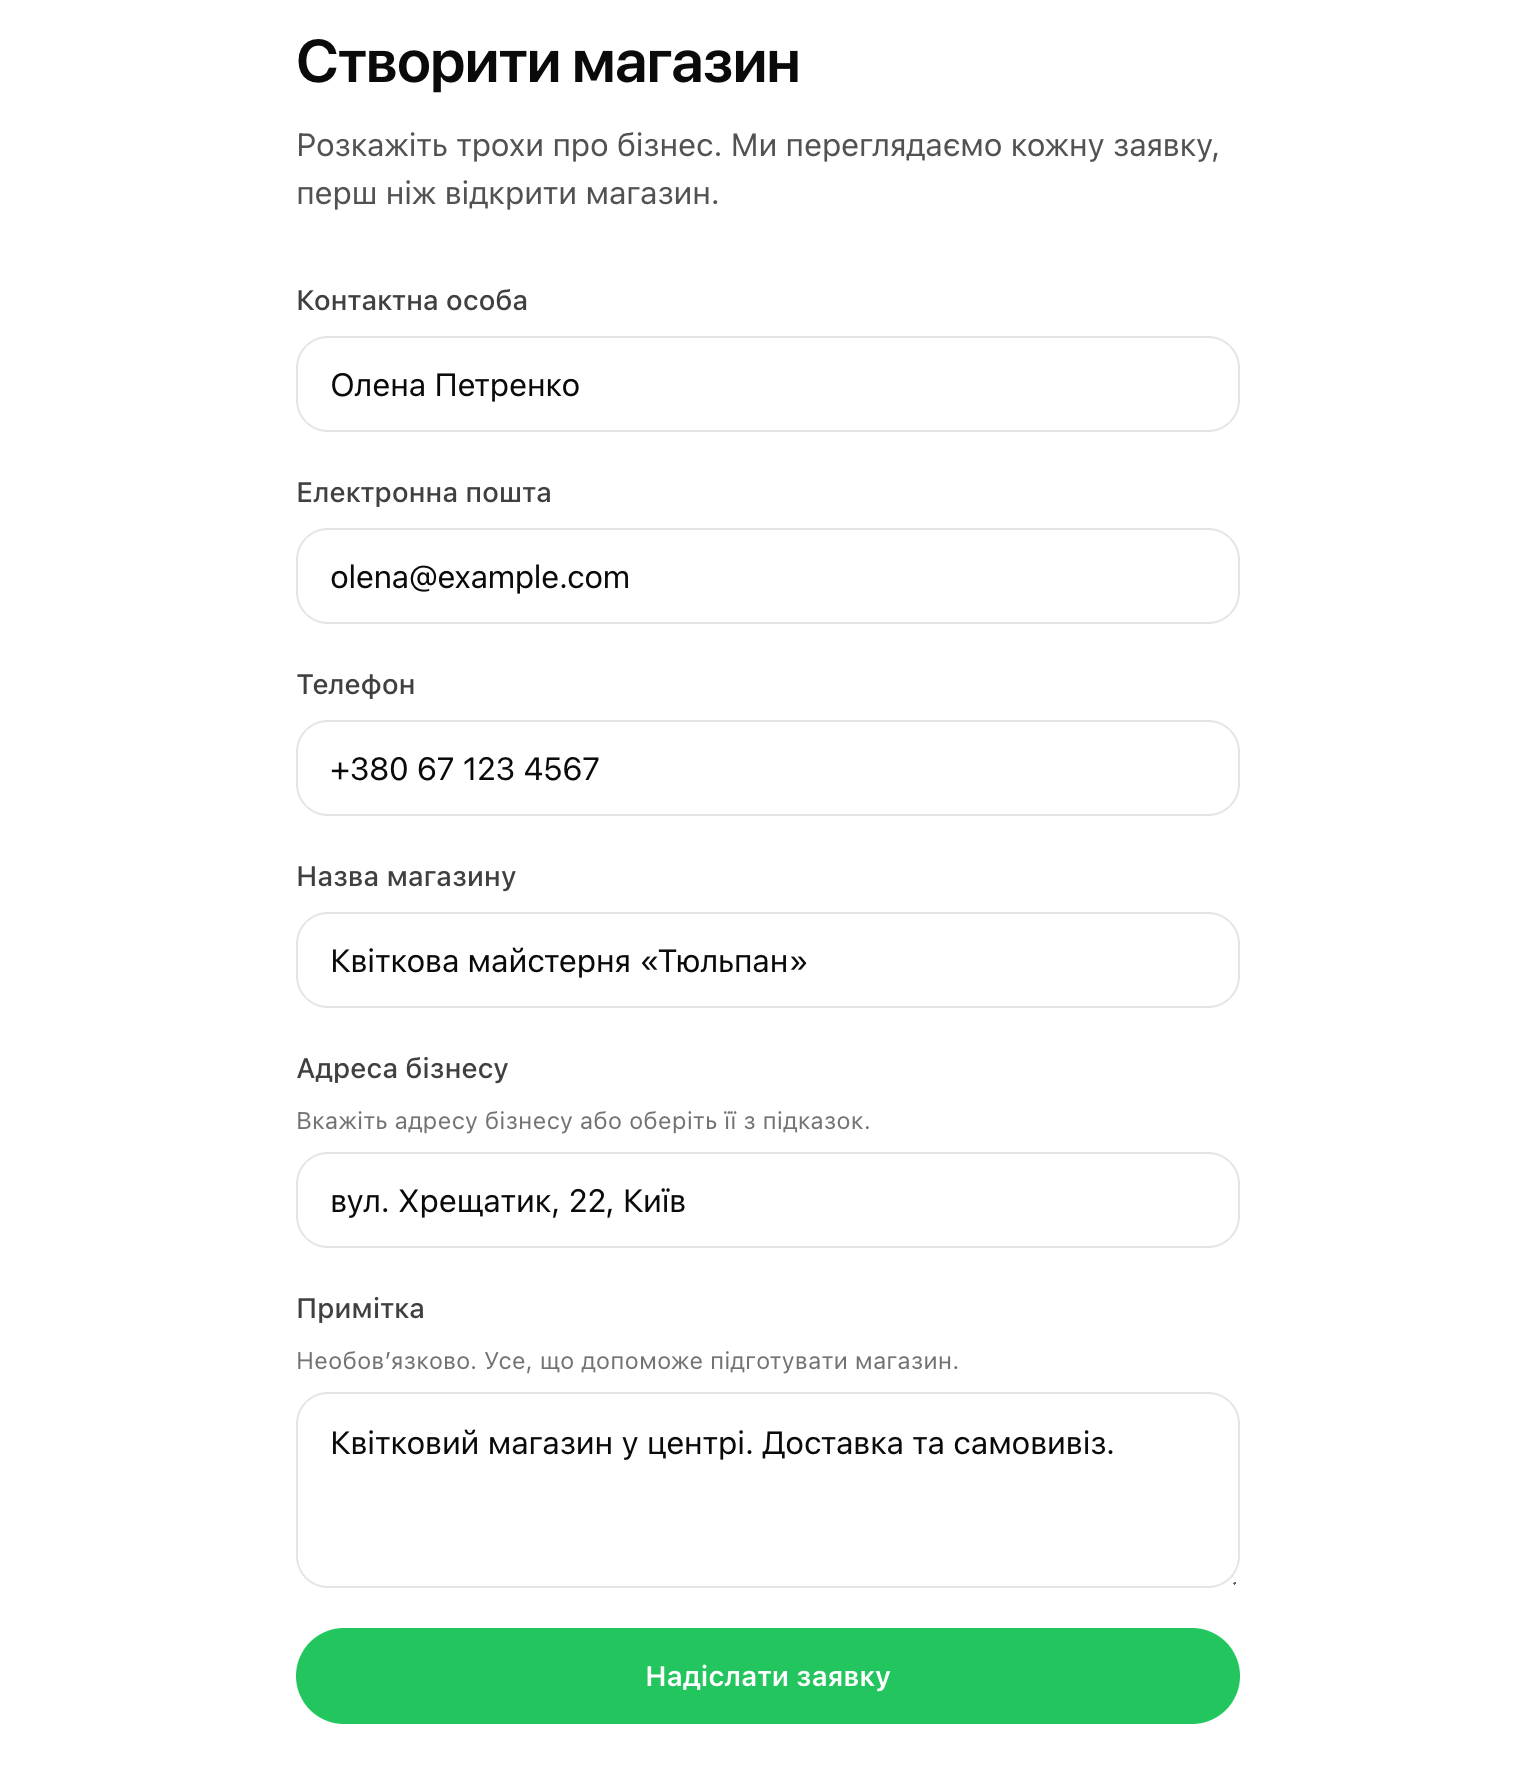
On the Kliovio website, open the Create store form and briefly describe your business: name, contacts, and a few details.
Applications are reviewed first. The store and dashboard access do not appear the moment you click submit.
When the Kliovio team approves the application, you receive an email with a link to create a password and sign in.
- 1 Fill in the form on the website.
- 2 Wait for the approval email with the password link.
- 3 Create a password and open the dashboard.
This is not instant one-click signup. Approval is required before the store appears on the platform.
Step 2
Sign in and set up your shop
After you create a password, you enter the store dashboard. From there you manage the storefront, products, and orders.
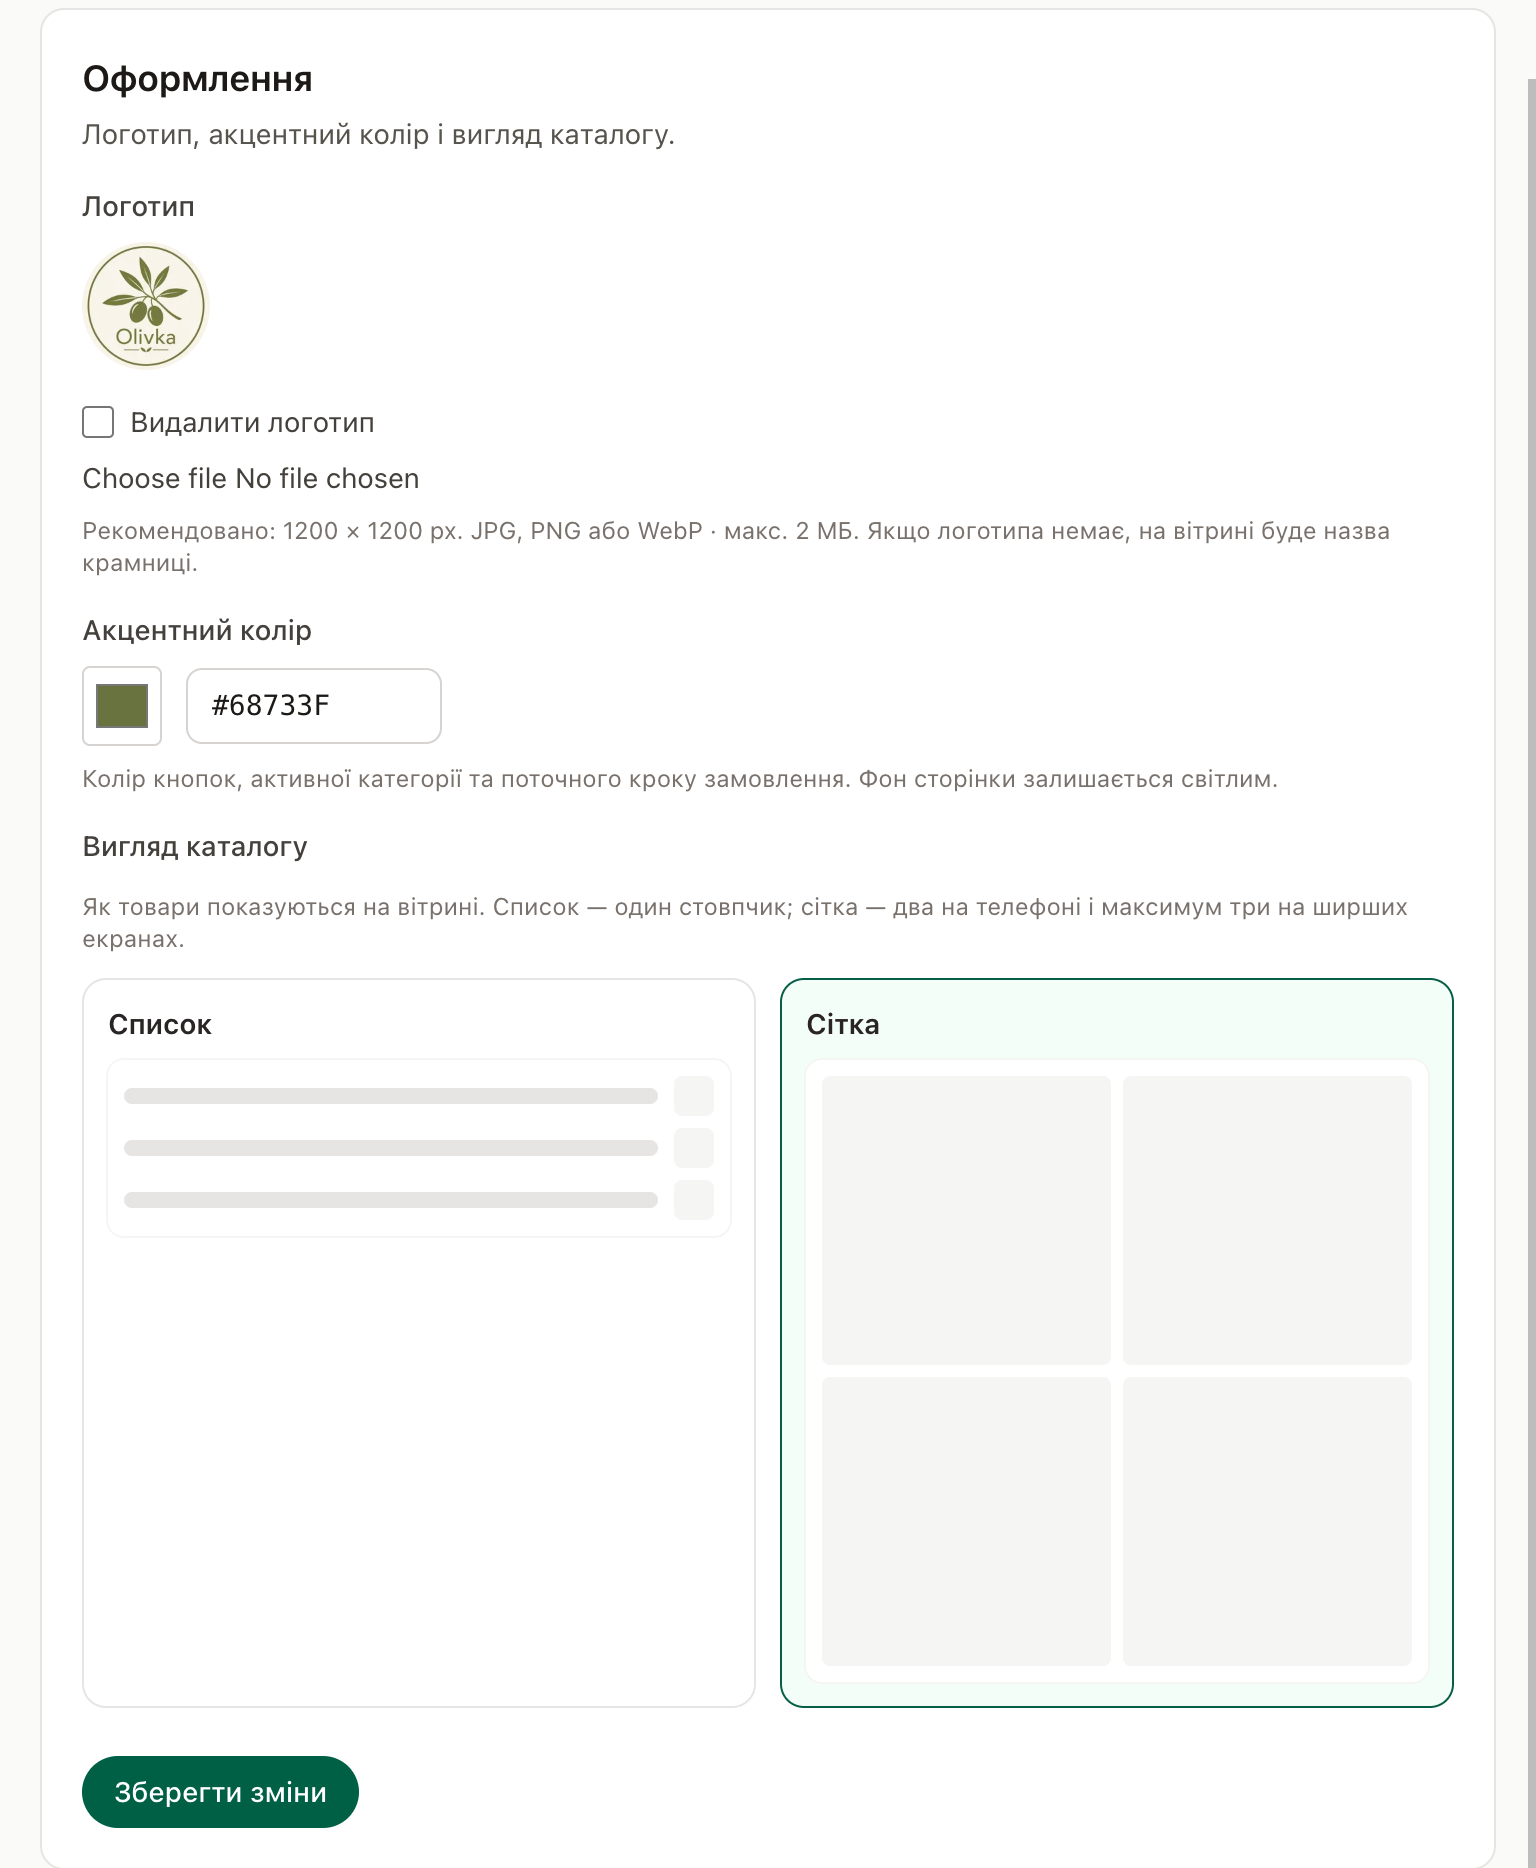
Start with the shop name, logo, accent color, and contacts so customers recognize your brand.
You can preview the customer storefront and adjust details before you start selling.
- 1 Name, logo, and a short description.
- 2 Accent color and storefront look.
- 3 Phone, address, and other contacts.
Everything uses clear forms. You do not need a separate designer or developer.
Step 3
Add catalogs, categories, and products
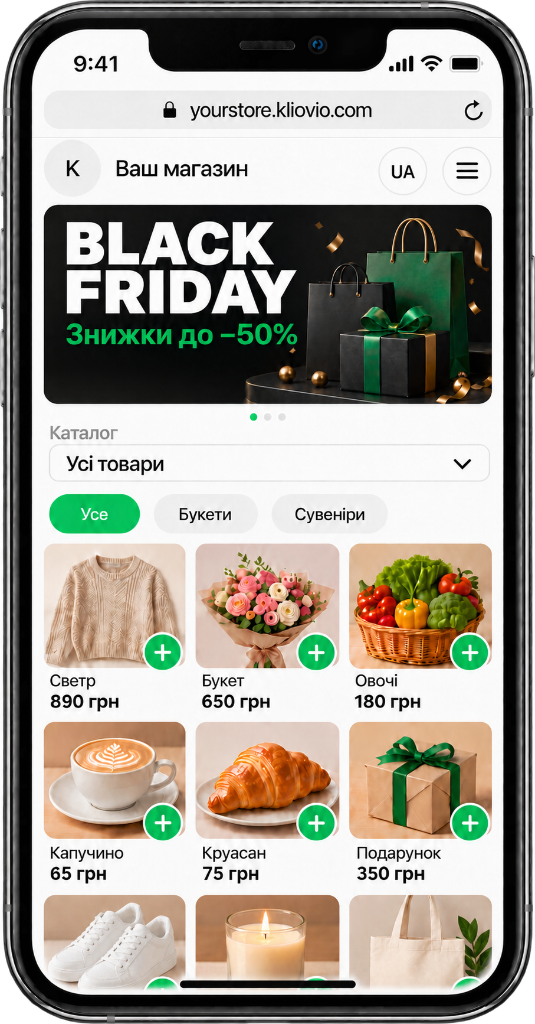
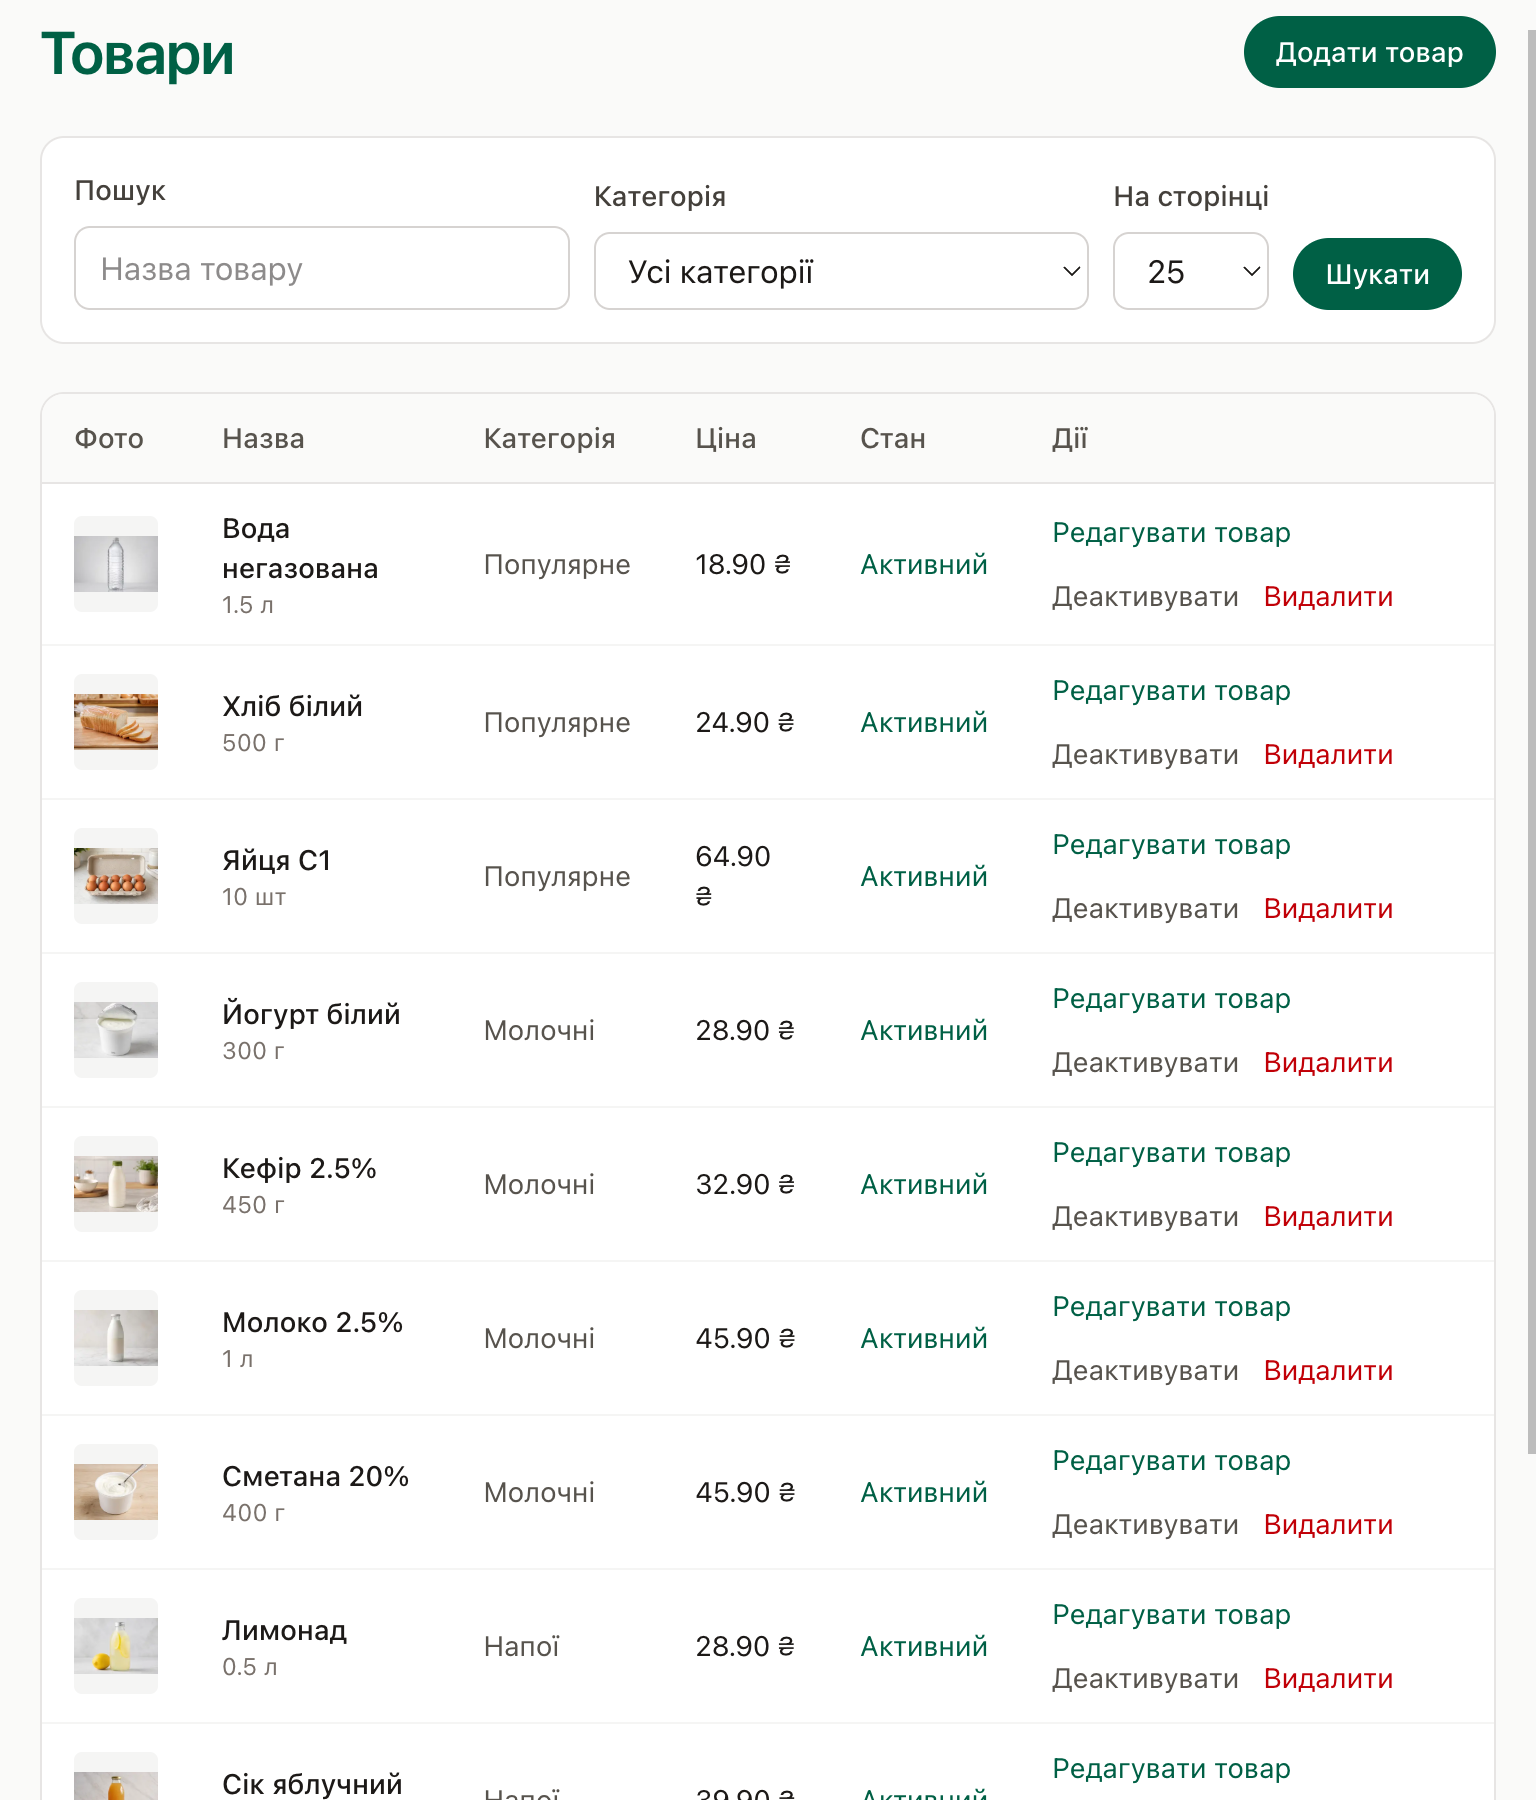
A catalog is a large assortment section. Inside a catalog you create categories, and inside categories you add products with a photo, name, and price.
For example, you can create two catalogs: Flowers and Gifts. Flowers can hold bouquets; Gifts can hold sets and souvenirs. Customers pick a catalog first, then browse its categories.
Add photos, short names, and prices. You can turn products on or off when something runs out.
- 1 Create a catalog (or more than one).
- 2 Add categories inside the catalog.
- 3 Add products: photo, name, price.
Multiple catalogs help when the assortment is mixed — for example flowers separate from gifts.
Step 4
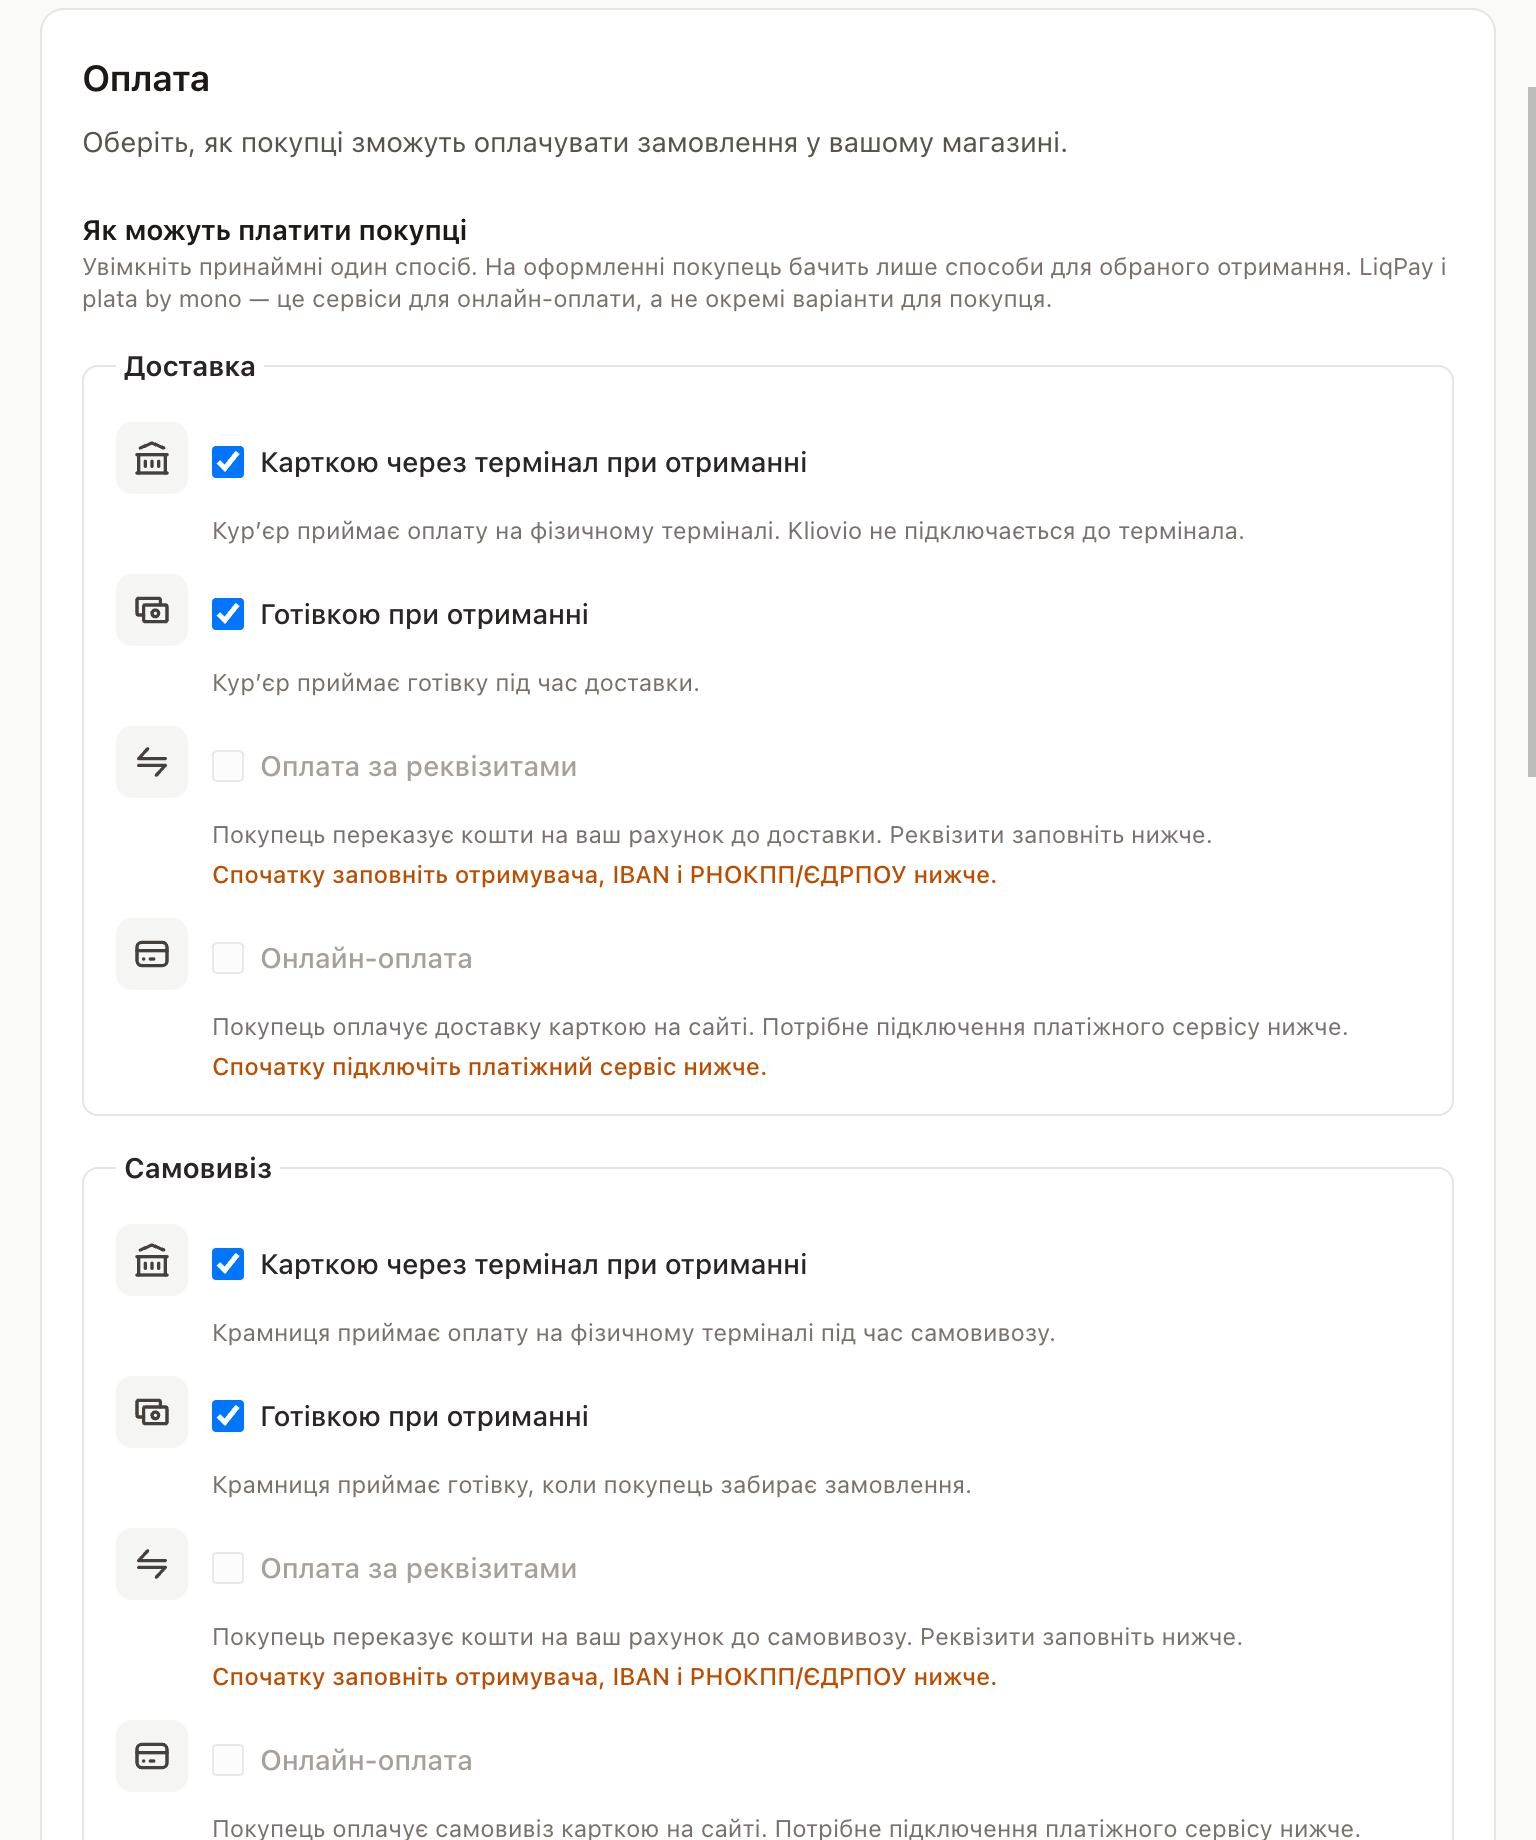
Choose how you take payment
Turn on only the methods you actually use in your shop.
Customers can pay online by card on the site, by card or cash on receipt, or by bank details — depending on what you enable.
Online card payment needs a separate setup. If it is not ready yet, customers can still order with payment on receipt when you allow it.
- 1 Online by card — when payment happens on the internet.
- 2 Card or cash on delivery or pickup.
- 3 Bank details — when that is easier for your customers.
You do not need to enable everything at once. Start with what already works in your shop.
Step 5
Set up delivery or pickup
Decide how customers receive orders: pickup from your location, delivery with your courier, or another option that fits how you work.
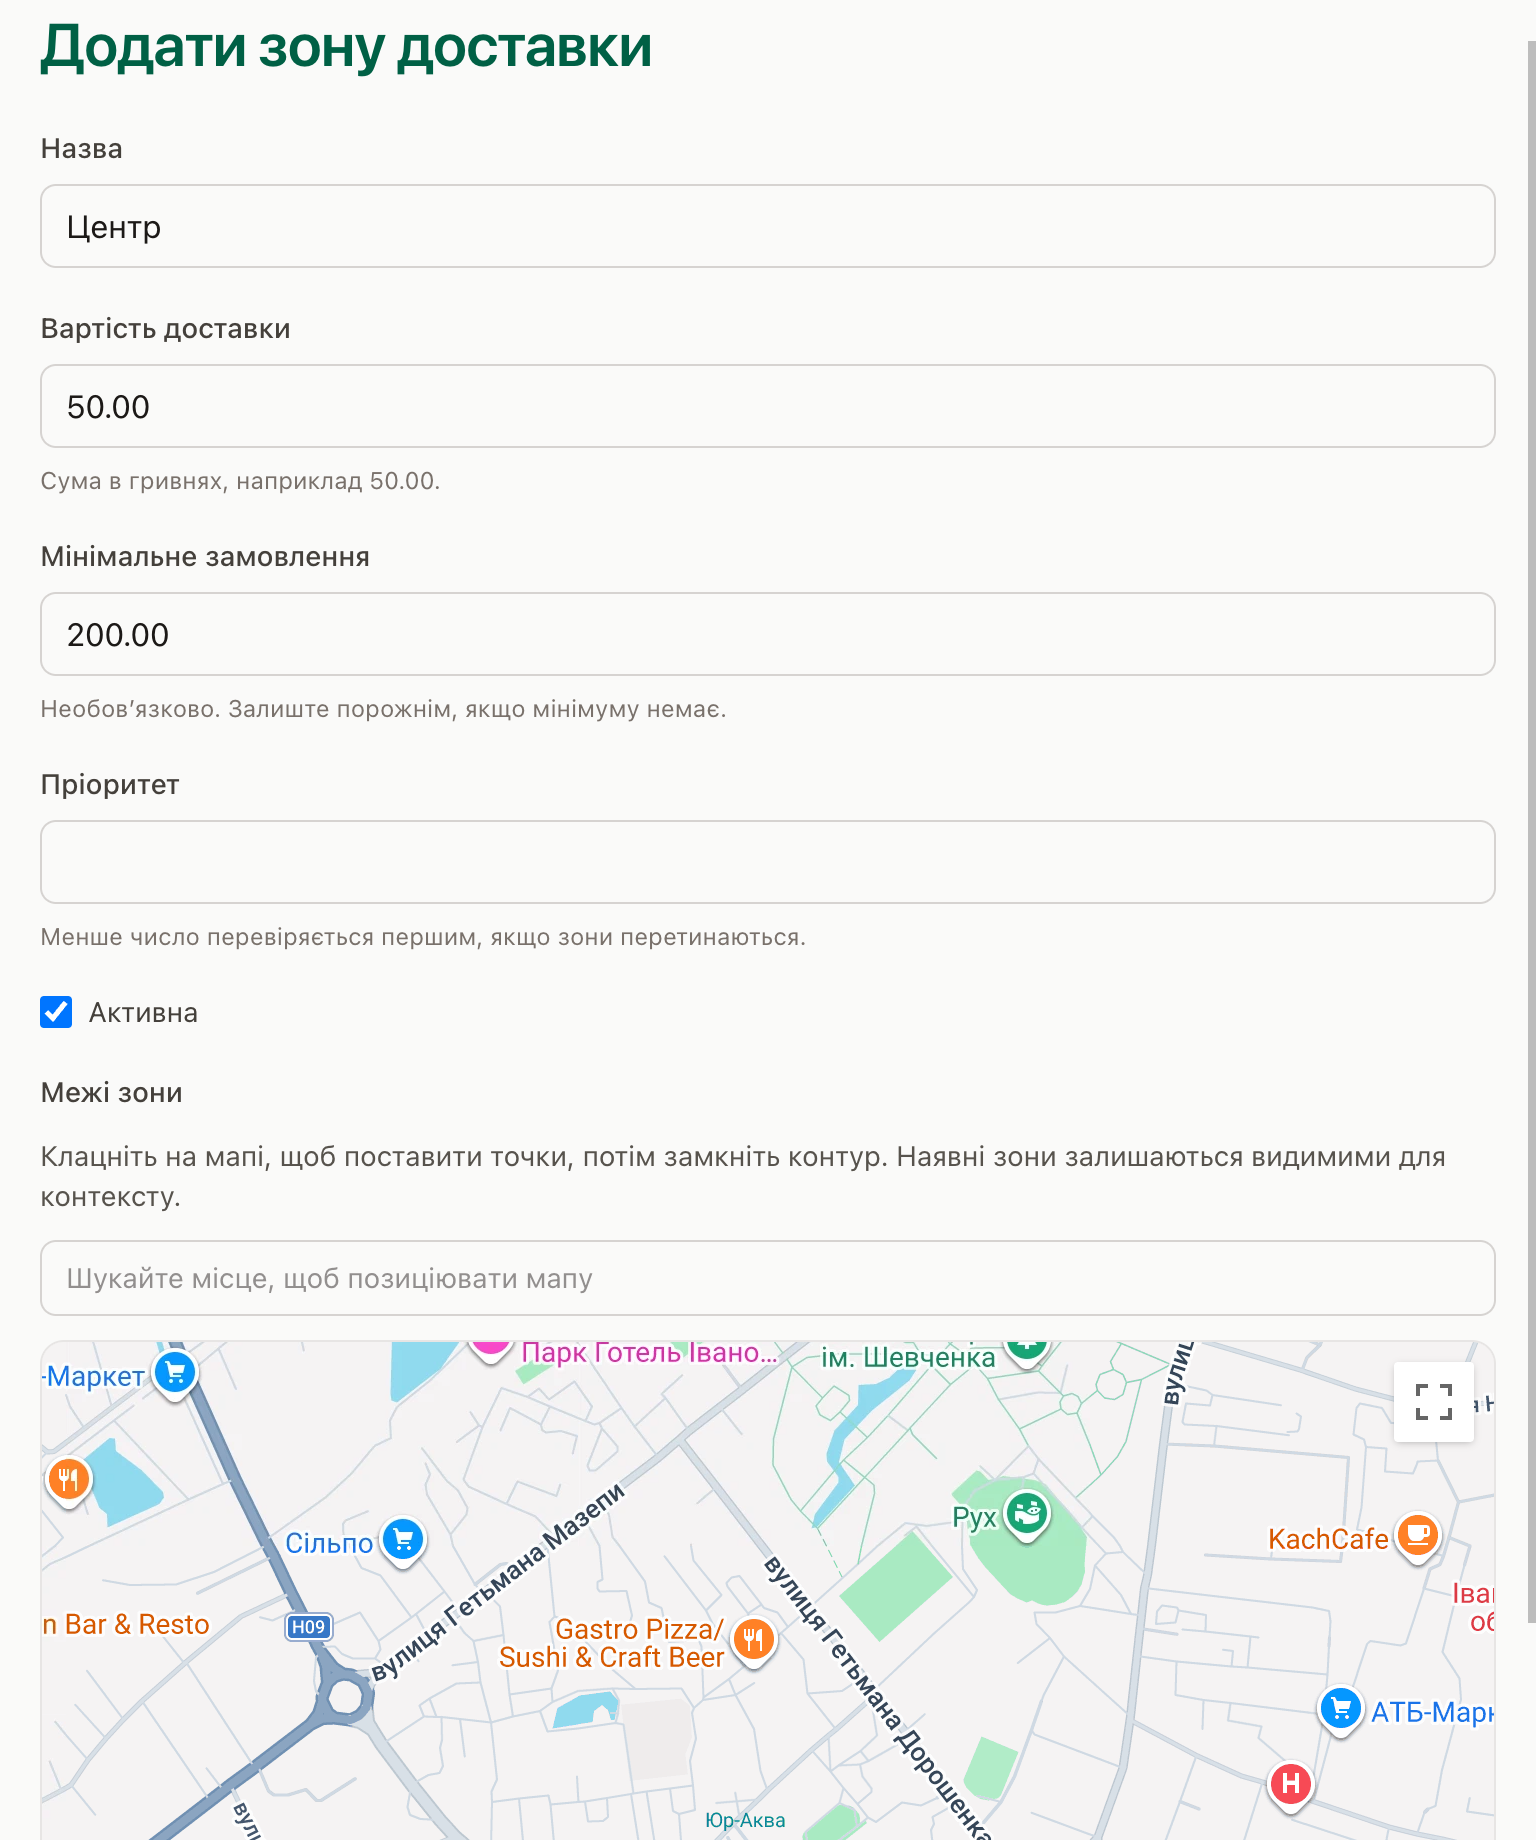
For delivery you can set areas and fees. For pickup you set where customers collect the order.
Kliovio helps you take the order and show the conditions. You or your partners handle the actual delivery — the platform does not deliver packages for you.
- 1 Enable pickup and/or delivery.
- 2 Set zones, delivery fee, and a minimum order if needed.
- 3 Check that the conditions are clear at checkout.
This is your logistics. Kliovio is not a delivery courier service.
Step 6
Share the store with customers
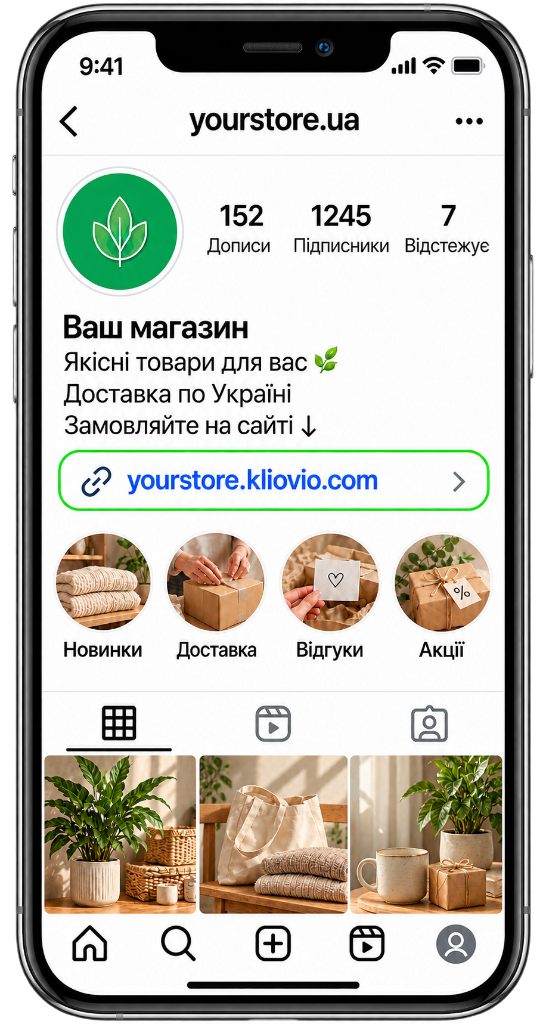
Every store has its own link. Add it to Instagram, Facebook, TikTok, or Telegram, or send it in a message.
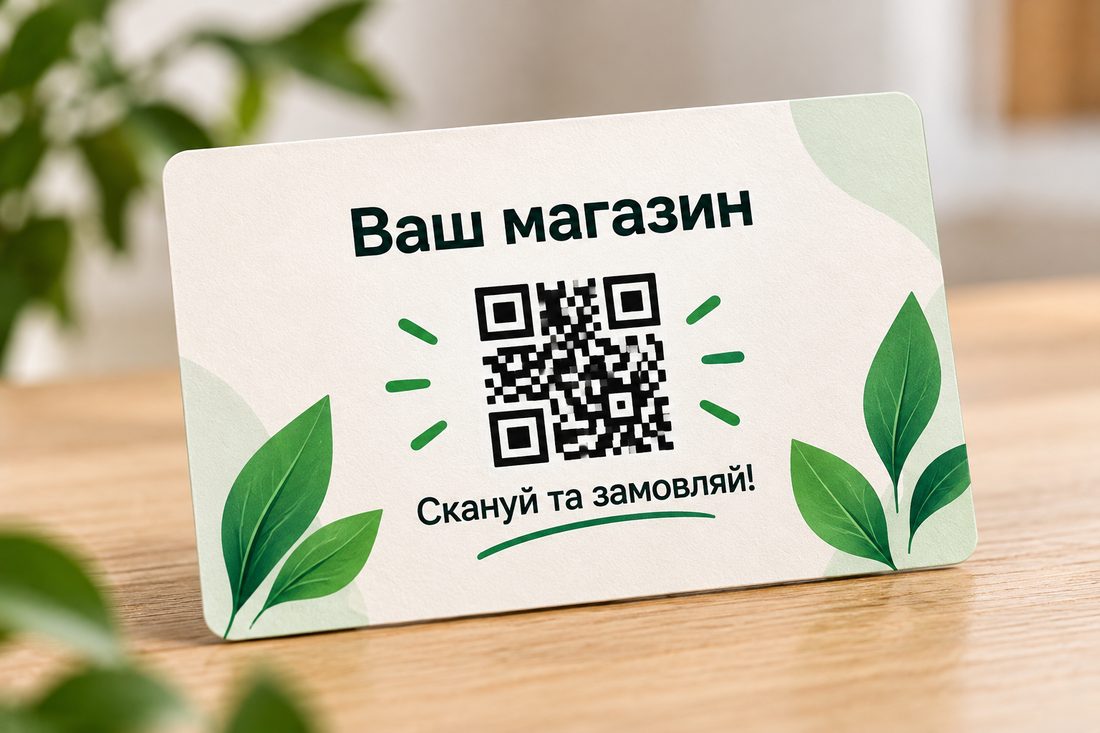
There is also a QR code. Print it on a business card, bouquet tag, bag, counter sign, or flyer — customers scan it and open the catalog.
The same store works online in social networks and offline wherever people already see you.
- 1 Copy the link into a social profile.
- 2 Download and print the QR code.
- 3 Place the QR where customers already look for your products.
The QR code and link open your storefront — customers do not need a separate app.
Step 7
What happens after an order
The customer picks products, enters a name and phone number, chooses fulfillment and payment, and confirms the order.
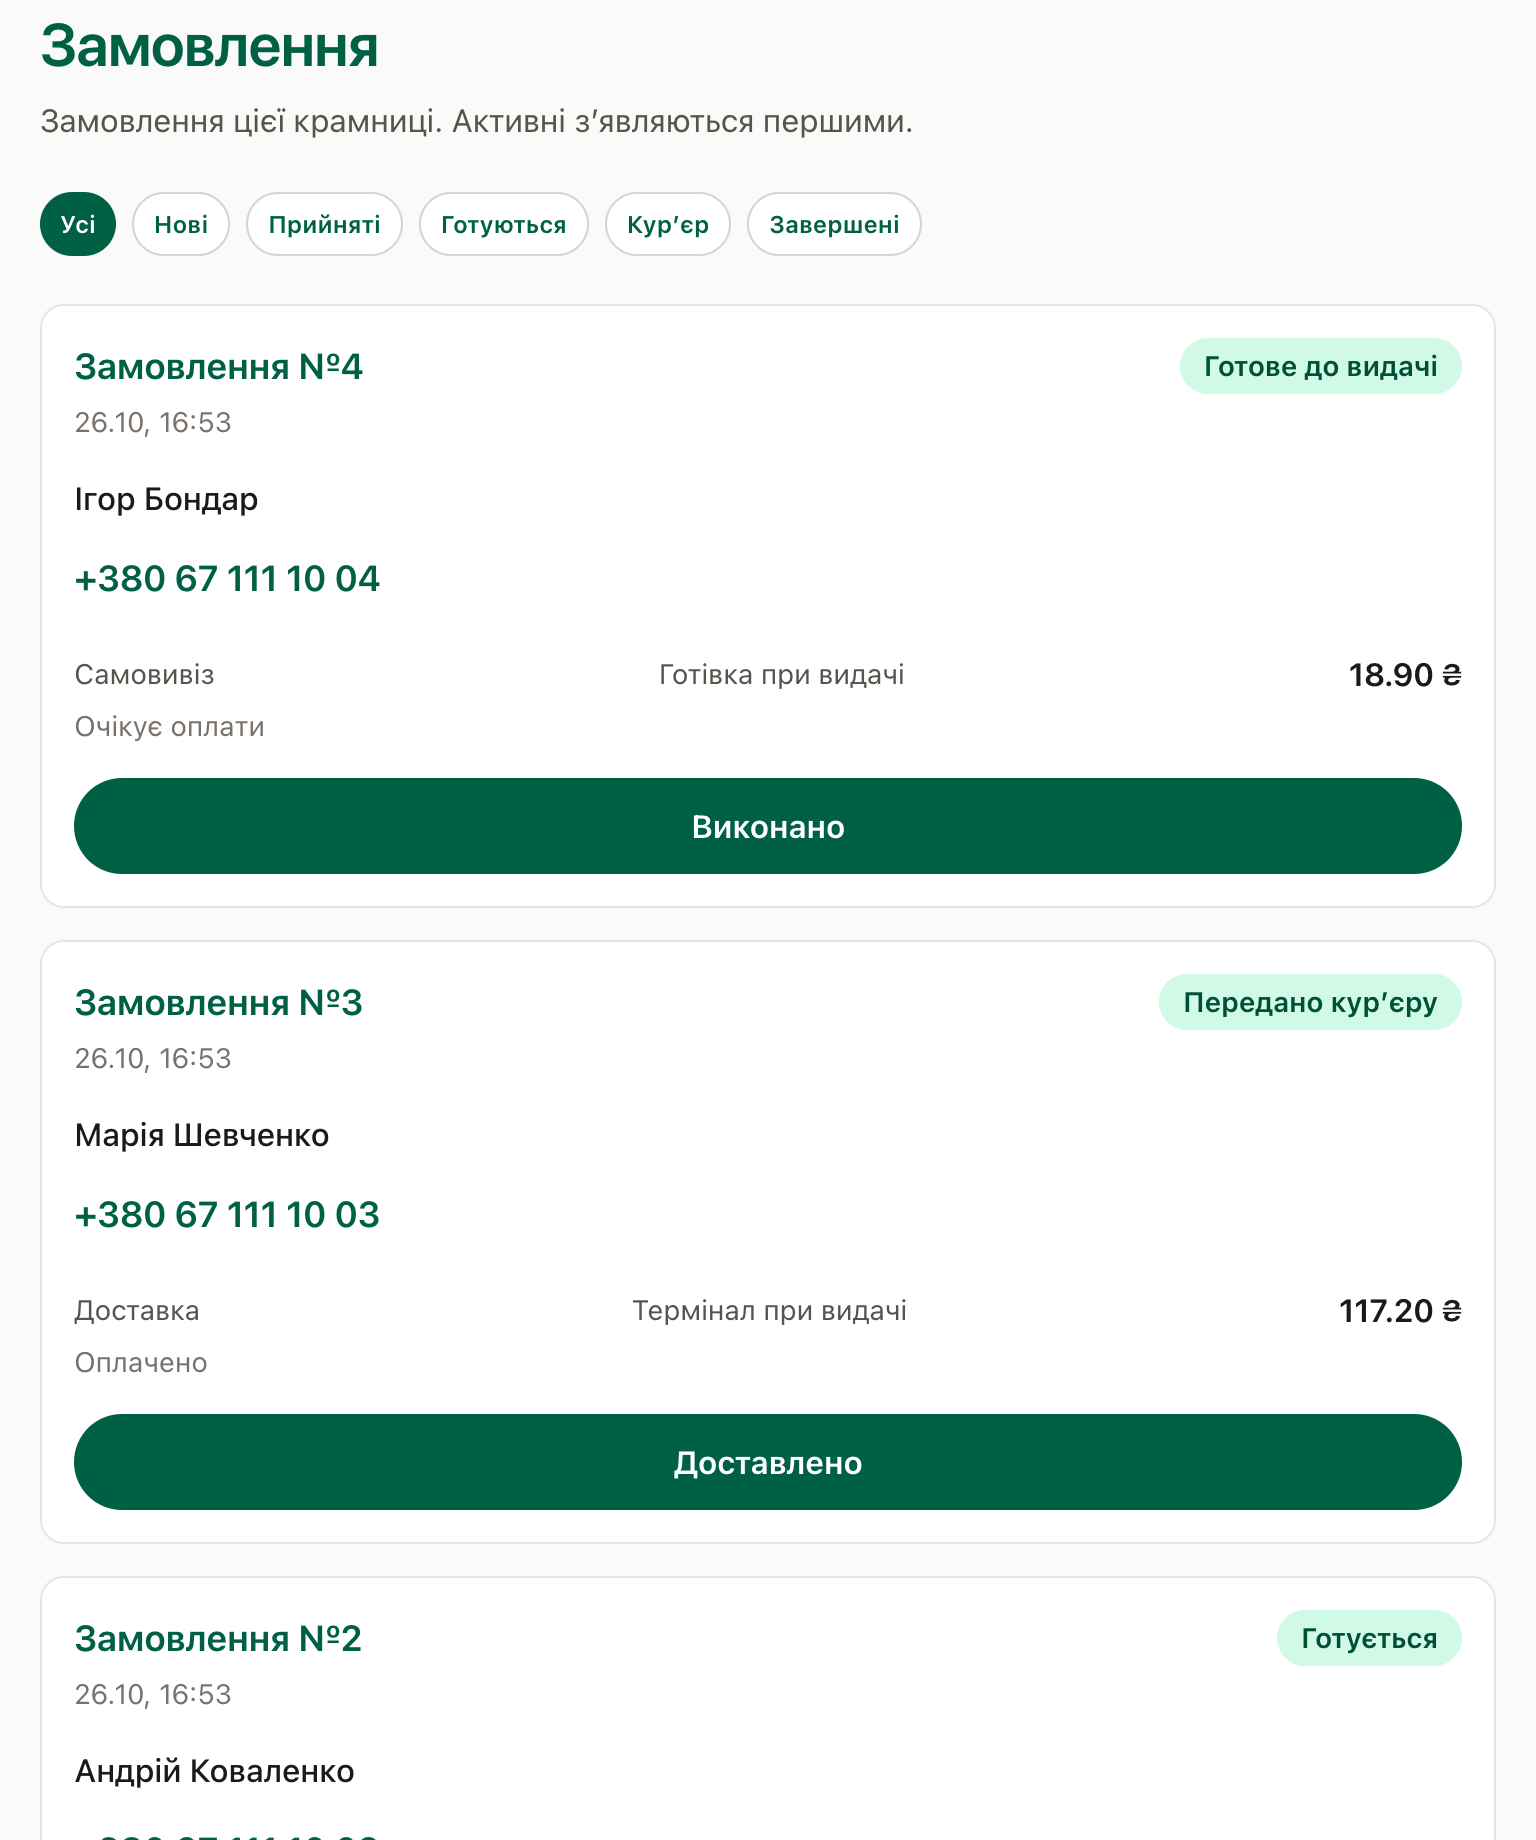
You see the new order in the dashboard, can update its status, and can call the customer using the phone number.
In settings you can also connect Telegram — then each new order sends a message to your chat.
Then it is like your usual shop: assemble the order, hand it over for pickup, or send it with your delivery.
- 1 The customer places the order on a phone.
- 2 You receive it in the dashboard.
- 3 Optionally connect Telegram to get order notifications.
- 4 You update the status and fulfill pickup or delivery.
Nothing fancy to learn — orders in the dashboard, with optional Telegram alerts.
Ready to try?
Submit an application — after approval you get an email with dashboard access and can set up the store yourself.
No programmer required. We do not promise an instant launch without application review.